When I’m working on a new illustration pattern, I always start by drawing on my iPad in Procreate. There, I can play around with shapes and get the more authentic feeling that comes with drawing by hand.
Once I’m happy with what I’ve drawn in Procreate, I transfer it into Adobe Illustrator on my computer. There, I’m able to vectorize the illustration, play around freely with colours, and create patterns that are endlessly flexible.
In this post, I’ll show you how to take a raster illustration from Procreate and turn it into a vector image in Adobe Illustrator.
Before diving in, it’s important to remember that there are many different ways to vectorize your Procreate illustrations. I still learn new things every day, so my process is always changing and evolving as I am. There are also many different methods that work better for different illustration styles. What I’ve outlined in this post is just the method that works for my current skill set and my signature illustration style – simple, flat shapes.
Step 1 - Draw on Separate Layers in Procreate
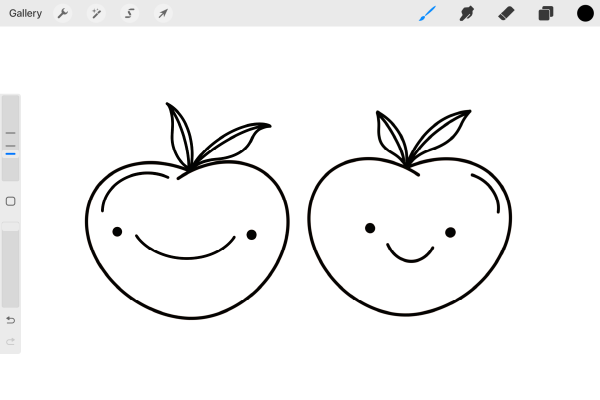
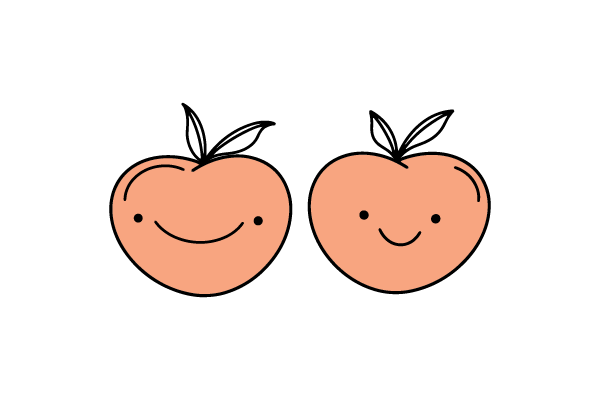
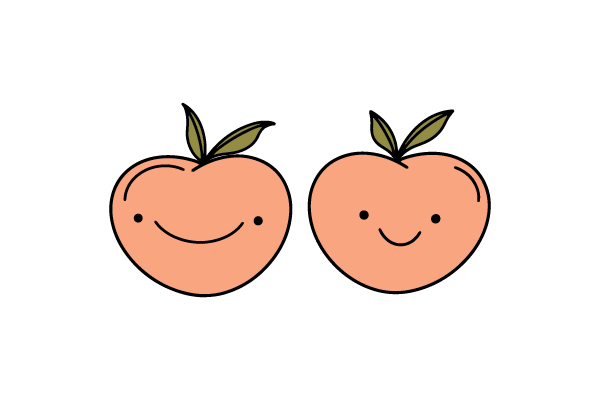
The first step is to actually draw your illustrations in Procreate. In my demo for this post I’ve drawn two simple peaches so you can easily follow the steps. I usually like to draw in Procreate with a black monoline brush on a white background. Though this isn’t as fun as drawing with colour right away, it keeps things simple and means I don’t have to worry about choosing the right colours at this stage.
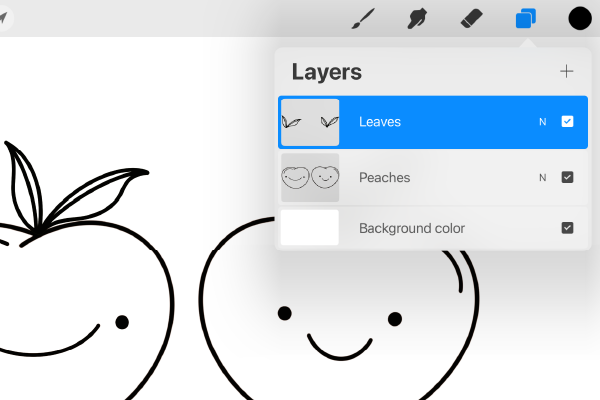
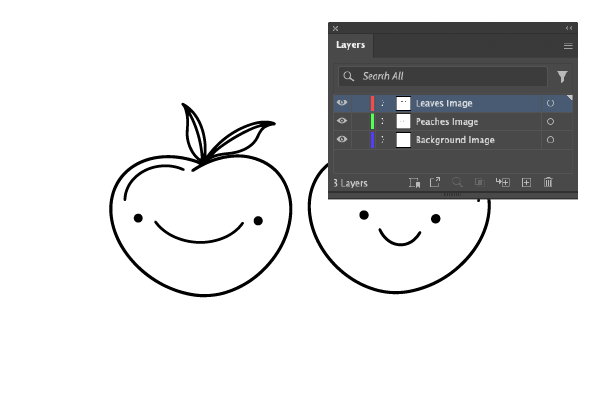
The most important thing to remember when drawing is that you need to keep overlapping shapes on separate layers. This is because you need the elements to be separate when you transfer them into Adobe Illustrator. That way, you will be able to colour them differently. If you were to draw them on the same layer and then transfer them into Illustrator, they would be one single shape.
In my demo, that means that the peaches and the leaves are on two different layers, so that when I bring them into Adobe Illustrator, I can make the leaves green and the peaches pink.
Step 2 - Export Your Files from Procreate
Once you are happy with your illustration and each overlapping element is on a separate layer, you can export it from Procreate. Click the wrench icon in the top left and click Share. Then under Share Image click PSD. This is creating a Photoshop file, which you can then open in Illustrator. I usually AirDrop my files to my laptop, but you can choose any method you’d like to get your files from Procreate to Adobe Illustrator.
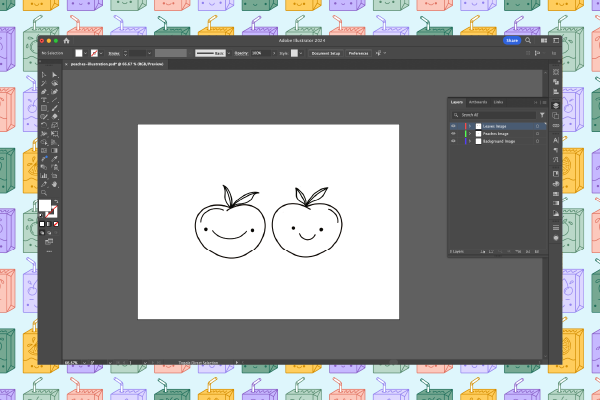
Step 3 - Import Your Files into Adobe Illustrator
Adobe Illustrator Tip
If you ever need a panel that you can’t find on the right hand side menu, just click Window in the top menu bar, then select that panel and it will appear.
Step 4 - Trace Your Illustrations in Adobe Illustrator
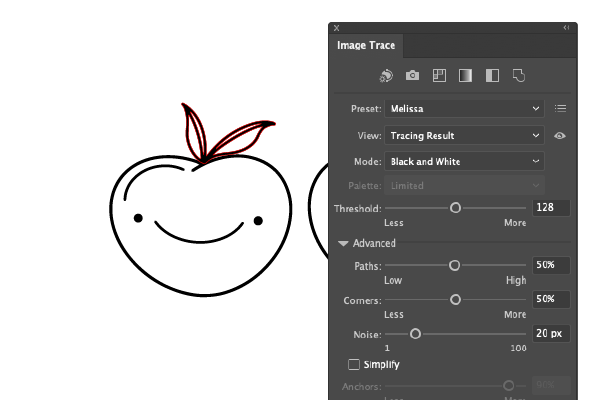
Now that your files are open in Illustrator, you can start to trace them, but don’t worry, you don’t have to do this by hand. Instead, you’ll use the Image Trace panel. Remember, if you don’t see this on the right, click Window > Image Trace in the top menu bar and it will open.
Once the panel opens, select the top layer of your illustration by clicking on it. You’ll know it has been selected because there will be a coloured rectangle around the whole artboard. In my demo, my top layer is the leaves.
Once you have your layer selected, click on the Preset dropdown in the Image Trace panel. Here, there are lots of options to play around with. Black and White Logo is a great place to start, and will usually capture most of your illustration. Select that, and then play around with the toggles to change how much of the image is captured.
I also like to check the box for Ignore Color and set that colour to white. This just means that white will be ignored and deleted, and only the black drawing of your illustration will be captured. Since I draw with a lot of outlines, this is a great way to make sure only the outlines are captured, and not the inside of the image as well.
If you are going to be vectorizing your drawings often, it’s a great idea to save a preset here so you can easily use the same settings every time. To do this, once you have a setting you like, click the three lines next to the preset dropdown, and click Save as New Preset. I’ve named mine Melissa so it’s always easy to spot, but you can name yours whatever you want.
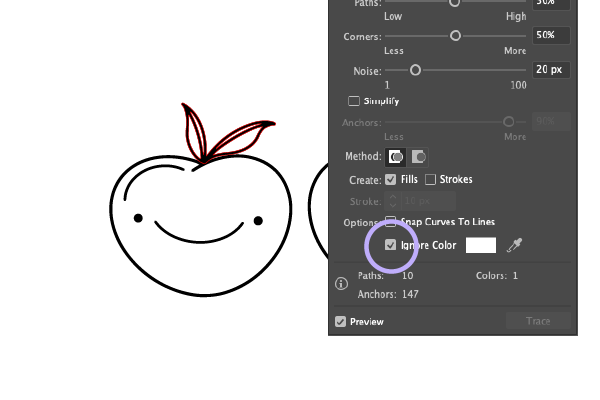
Step 5 - Expand Your Illustrations
Next, while you still have your illustration layer selected, click the Expand button in the menu at the top of the screen. This outlines the illustration, and turns it into an editable vector.
After that, repeat steps 4 and 5 for every layer in your illustration. In my demo, I’ll follow these steps one more time for the peaches.
Once you’ve traced and expanded all your layers, press Command + A. This selects all of the items on our artboard, and you should be able to see the outlines of each individual item. Then click on Object > Ungroup in the top menu bar to separate the items that were automatically grouped together because they were on the same layer.
Step 6 - Fill in Your Shapes
If your illustrations are outlines like mine, then this is the part where you will add the inside colour of each illustration. If you just drew solid shapes, then you can skip this section because you likely already have full shapes that are filled in.
First you want to make sure all your elements are on one layer. Go to your layers panel, select all the layers, click the three lines in the top of that panel, and click Merge Selected. This moves all of your artwork onto one layer.
To add a fill colour to your shape, you will use the Live Paint tool. Select your entire illustration, and then go to Object > Live Paint > Make. This converts all the elements of your illustration, even the empty inside sections, into areas you can add colour to.
Next, click on the Live Paint tool in the left hand sidebar.
Adobe Illustrator Tip
If you ever have trouble finding a tool in the left hand sidebar, click the three dots at the bottom of the bar, then click the lines, which allows you to see you the name of each tool.
Once you have the live paint tool selected, choose a colour from the swatch selector (the coloured box on the left). At this point, the colour doesn’t matter, just choose something different from black so you can see it easily. Then, all you have to do is click on each empty section of the illustration to add colour to it.
Once you have added colour to every section, select it all again, and then go to Object > Live Paint > Expand. This turns each coloured section into it’s own element, so that you can easily edit them or change the colours later on.
In my demo, I now have the outline of my peaches and the fill colour inside them. At this point you’ll have to ungroup the shapes again to separate them.
Step 7 - Perfect Your Colour
Finally at this step you should have a complete illustration that is filled in, that’s just waiting for the right colours! You can now spend more time carefully selecting the colour of each different element and play around with it as much as you want without worrying about degrading the quality of your illustration.
Adobe Illustrator Tip
If you want to select all the elements of the same colour, click on one of the elements, then go to Select > Same > Fill Color in the top menu bar.


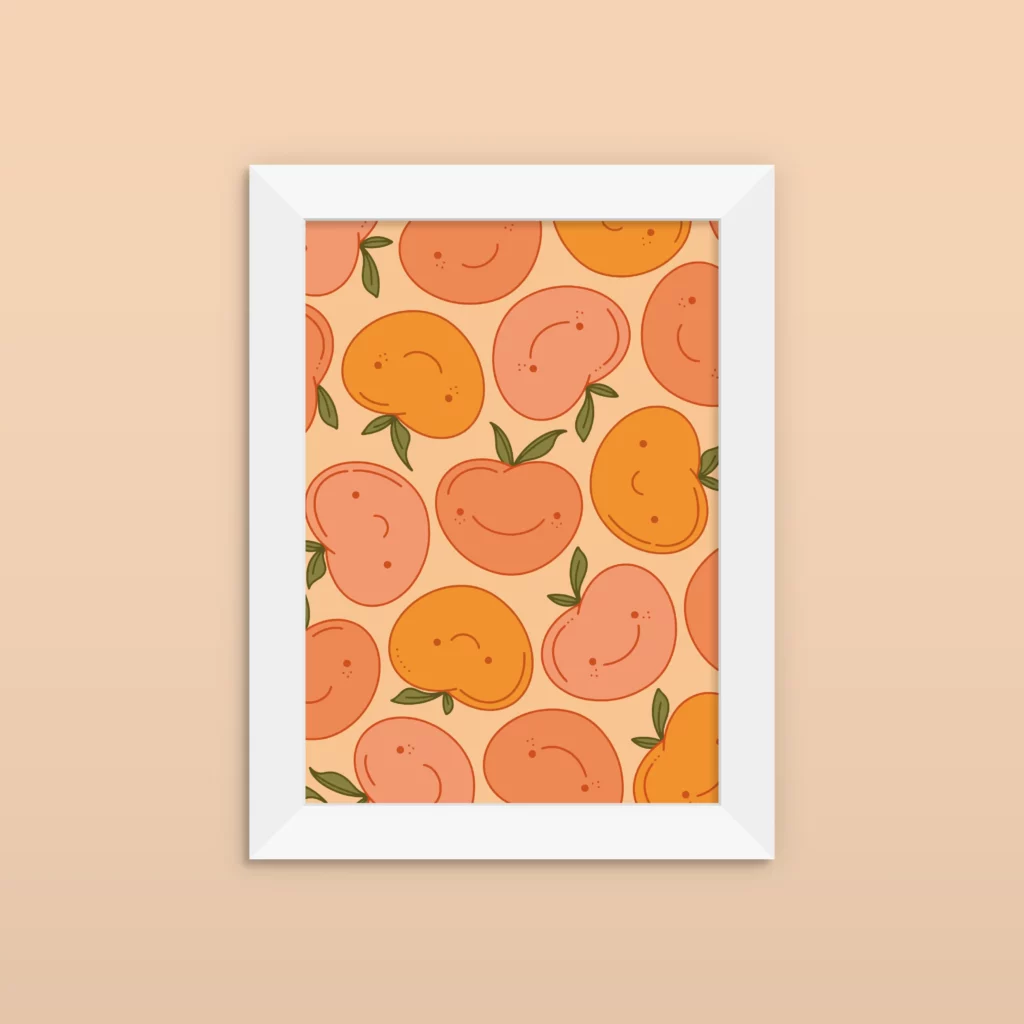
And there you have it. That’s how you vectorize an illustration that you’ve drawn in Procreate. At this point in my process I start playing around the pattern tool to make the illustrations into patterns – but that’s a tutorial for another day. Below is the peaches pattern I ended up creating in Adobe Illustrator, from my initial simple line drawing in Procreate.
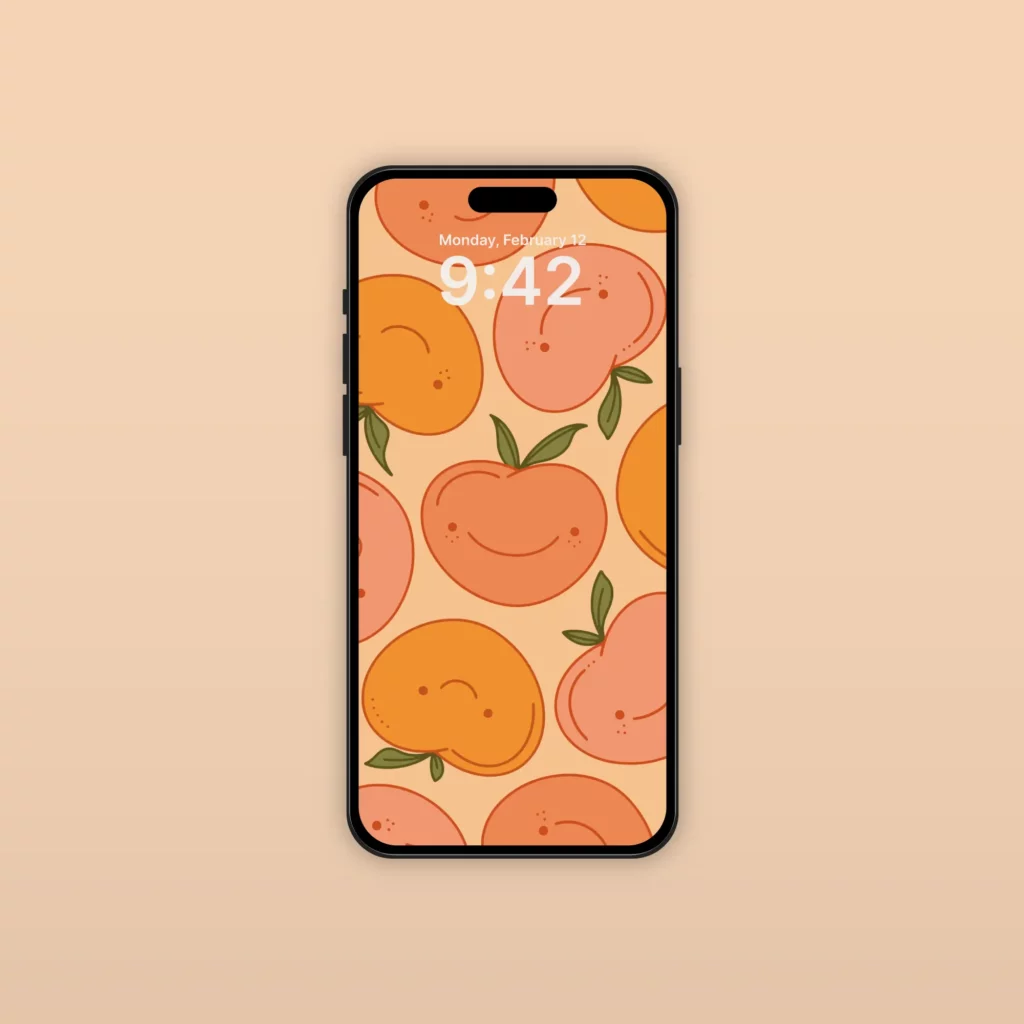
If you love these peaches as much as I do, they’re available in a bunch of different forms like greeting cards, art prints, digital wallpapers, and more.